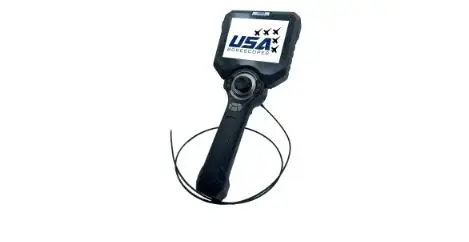
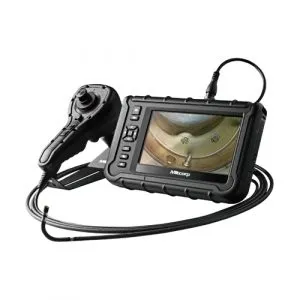
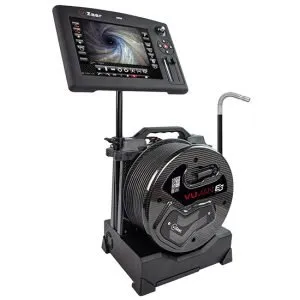
Measuring Borescopes for Aviation Applications

In aviation maintenance, internal inspections are rarely optional and never casual. Whether it’s a scheduled borescope inspection, a post-event check, or troubleshooting a performance issue, the goal is the same: determine what’s happening inside the engine or component without turning the job into a teardown. But just seeing an indication isn’t always enough; many decisions hinge on whether a defect is within allowable limits and whether it’s changing over time. That’s why measuring borescopes have become a go-to tool in aviation workflows, helping maintenance teams capture dimensional data in tight spaces and build documentation that stands up to review. For organizations evaluating inspection equipment, USA Borescopes is one of the suppliers supporting measurement-driven remote visual inspection (RVI) needs across aviation and beyond.
Why Aviation Teams Rely on Measuring Borescopes
Aviation is a high-stakes environment where reliability, traceability, and consistency matter. Measuring borescopes help address several common pressures maintenance teams face.
Faster inspections without teardown
Disassembly costs time, labor, and risk. Even when teardown is possible, it may not be practical if the issue can be evaluated internally. Measuring borescopes support internal checks that can keep aircraft moving while still producing inspection records that are useful for decision-making.
Turning “looks bad” into measurable data.
One of the biggest advantages of measurement is reducing subjectivity. Two technicians might describe the same nick differently, especially if they’re viewing it from different angles or under different lighting. Measurement tools help standardize how findings are recorded and discussed.
Better tracking over time
Many aviation maintenance decisions are about trend, not a single snapshot. A feature that is acceptable today might not be acceptable after additional cycles. Measuring borescopes enable documentation that makes it easier to compare the same area across inspections.
Cleaner communication across teams
Maintenance findings often need to be shared across shifts, stations, or between a line maintenance crew and an engine shop. Measurement-backed images and reports can make handoffs clearer and help avoid misinterpretation.
What Gets Measured During Aircraft and Helicopter Engine Inspections
Aircraft and helicopter engines include multiple sections and component types, each with its own common findings. Measuring borescopes can help quantify these indications so technicians can document severity and support repair/monitor/replace decisions.
Compressor section findings
The compressor section is exposed to ingestion risks and operational wear. Common findings include:
- Nicks and dents (including FOD-related damage): Measuring tools can help quantify length/width and estimate severity relative to acceptance criteria.
- Erosion and surface wear: Measurement helps document how wear patterns are changing over time, especially when comparing across intervals.
- Tip damage and edge deformities: Even small changes at the edge or tip of a blade can affect efficiency and may need monitoring.
In this section, measurements are often most useful when they’re captured consistently; same viewing distance, similar angle, and clear documentation of blade location or stage.
Combustor and hot-section findings
Hot-section areas tend to involve a different set of concerns, where documentation and trending can be especially important. Findings may include:
- Cracking or heat distress indications: Measuring borescopes can help characterize crack length or feature size so progression can be tracked.
- Coating distress and surface degradation: Surface change can appear dramatic depending on lighting; measurement-backed documentation helps reduce misinterpretation.
- Localized pitting or material loss: Depth-aware measurement (where supported) may help estimate severity, especially when used within the system’s effective measurement range.
Hot-section inspections also highlight why image quality and lighting control matter. Reflective, high-temperature surfaces can create glare, and stable probe positioning becomes critical for reliable measurement.
Turbine section findings
Turbine components operate in extremely demanding conditions. Measurements here are often used to document:
- Pitting, corrosion, and material loss: Capturing size and location helps maintenance teams decide whether the feature is stable, progressing, or crossing an allowable threshold.
- Crack-like indications: Measurement doesn’t replace engineering evaluation, but it can support a clearer record of length and appearance over time.
- Edge damage and geometry changes: Changes to edges, profiles, or surface contours may be important when evaluating the overall condition of the component.
Because turbine components can be highly contoured, this is also where advanced measurement approaches (including 3D measurement, when applicable) may provide a clearer picture, particularly if the goal is to quantify depth or characterize complex surfaces.
Documentation, Repeatability, and Audit Trails

In aviation, inspection documentation isn’t just helpful; it’s often essential. Measuring borescopes support documentation in several practical ways:
- Annotated stills and measurement overlays: A labeled image with measurement markers often communicates more than a paragraph of notes.
- Video capture for context: Video clips can show how the defect appears from multiple angles and provide situational context.
- Repeatable measurement records: If the same feature is measured across different intervals, the inspection record becomes far more actionable for trending.
- Reporting workflows: Many organizations rely on inspection reports to support internal reviews and external accountability. A streamlined capture-and-report workflow reduces friction and improves consistency.
A consistent process also protects teams from inspection drift, where small differences in technique cause findings to appear better or worse than they actually are. In other words, good documentation isn’t only about having records; it’s about having records that can be compared.
Choosing the Right Measuring Borescope for Aviation Work
Aviation borescope work comes with unique constraints: tight access, complex geometry, and environments that demand durable equipment. When selecting a measuring borescope, it helps to evaluate the tool as a complete system, not just a camera.
Diameter and access planning
Diameter is usually a primary constraint. A measuring borescope has to fit through the access route without forcing the technician to compromise probe control. Smaller diameter scopes can access more locations, but you also need enough image quality and lighting to define edges clearly for measurement.
Working length and articulation control
Aviation inspections often involve navigating around bends and positioning the camera at specific angles. Articulation matters because measurement is easier (and more repeatable) when the technician can stabilize the view and maintain a consistent distance from the feature.
Ruggedness and usability in real environments
Aviation inspections aren’t always done in ideal conditions. A scope may be used in a hangar, on the flight line, or in a shop environment with varying lighting and space constraints. That’s why usability factors, intuitive controls, stable articulation, and easy capture workflows can be just as important as a spec sheet.
Measurement and reporting features that fit your workflow
Different operations prioritize different outputs:
- Some need quick, repeatable point-to-point measurements.
- Others need deeper characterization, like depth estimation or surface mapping.
- Many need robust documentation workflows that support review and trending.
To compare system configurations and measurement features, it’s helpful to start with a selection designed around inspection use. The USA Borescopes products page is a practical place to review different tool types and measurement-capable options.
Aligning requirements with aviation and aerospace contexts
If your operation spans multiple aircraft types or maintenance contexts, industry-focused guidance can help. Reviewing aviation-related inspection considerations alongside other sectors can clarify which features are must-haves versus nice-to-haves. The overview on the USA Borescopes industries page provides a broader context for selecting inspection equipment based on the environment and typical inspection challenges.
Support Matters: Rentals, Repairs, and Inspection Help

Even the best scope is only valuable when it’s available and performing properly. In aviation, tool downtime can disrupt schedules, and measurement capability may depend on consistent performance and good technique.
That’s why many organizations evaluate more than the purchase; they also consider:
- Rentals for short-term projects, surge maintenance demand, or evaluating a system before buying
- Repairs and maintenance support to reduce downtime
- Inspection program support when teams need help selecting the right configuration or improving reporting workflows
These options often become part of the long-term cost and reliability story. For teams exploring these pathways, the USA Borescopes services page is a useful reference for support-oriented options beyond the initial equipment selection.
While engine inspections are the headline use case, measuring borescopes can also support internal checks in other aircraft systems where access is limited and documentation matters, such as components, structures, and areas where internal corrosion or surface damage is a concern. These use cases vary by platform and maintenance program, but the same theme holds: tight access plus the need for defensible documentation.
For a broader view of how measurement-enabled RVI is applied across equipment types, the examples on the USA Borescopes applications page can help connect the technology to practical inspection scenarios.
Measuring borescopes help aviation maintenance teams move beyond visual confirmation toward inspection records that are clearer, more consistent, and easier to trend over time. By enabling dimensional measurements inside tight inspection areas, especially in complex engine sections, these tools support faster decision-making, stronger documentation, and better communication across teams.
For organizations looking to equip or upgrade an aviation inspection workflow, USA Borescopes is positioned as a third-party resource for measuring borescope solutions, product selection guidance, and ongoing support. To discuss a specific aircraft or helicopter engine application, compare measurement-capable options, or explore rentals and service support, the next step is to contact them today.
About The Author
The author has extensive experience supporting aviation inspection workflows, with a strong understanding of aircraft engine inspections, regulatory expectations, and documentation requirements. They regularly work with maintenance teams to improve inspection consistency, measurement reliability, and long-term defect tracking in aviation environments.


![How to Retrieve NIN Number? [Explain in 4 Easy Steps] 9 How-to-Retrieve-NIN-Number](https://knwonzee.com/wp-content/uploads/2023/08/How-to-Retrieve-NIN-Number-768x432.png)


![Quantum Computing for Everyone [The MIT Press] 12 Quantum Computing for Everyone](https://knwonzee.com/wp-content/uploads/2023/08/Quantum-Computing-for-Everyone-1-768x432.png)